Helen MacRitchie Designs
follow on
  • Home
  • Profile
  • cv
  • Exhibitions
  • Gallery
    • Exhibition Hangings and sculptures
    • Bags
    • Wearables and accessories
  • Calendar
  • Workshops
  • Contact
  • Subscribe
  • Blog
  • Shop

On my Doorstep continues

7/19/2020

2 Comments

 
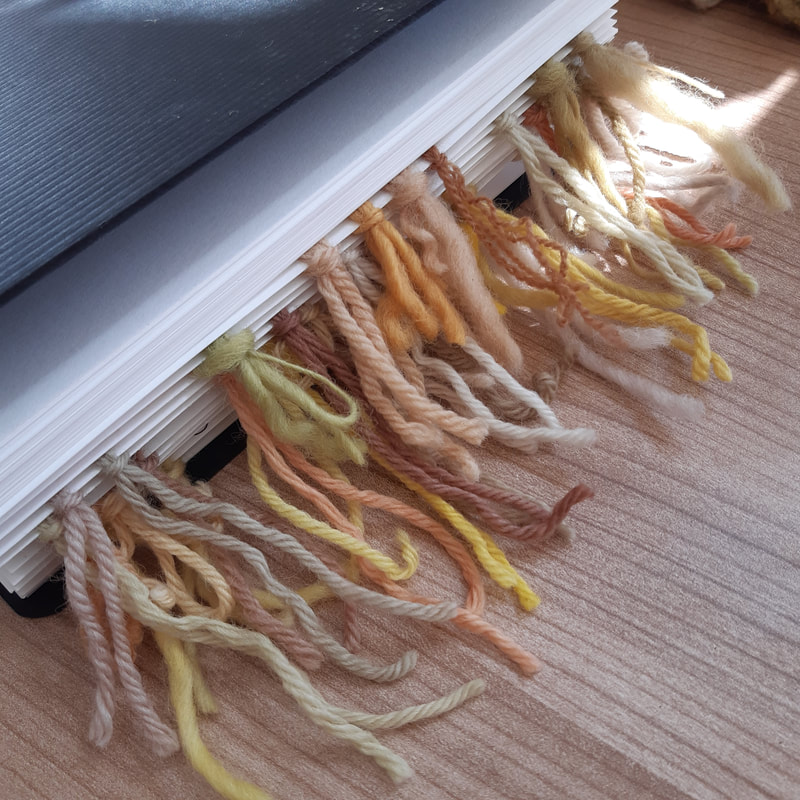
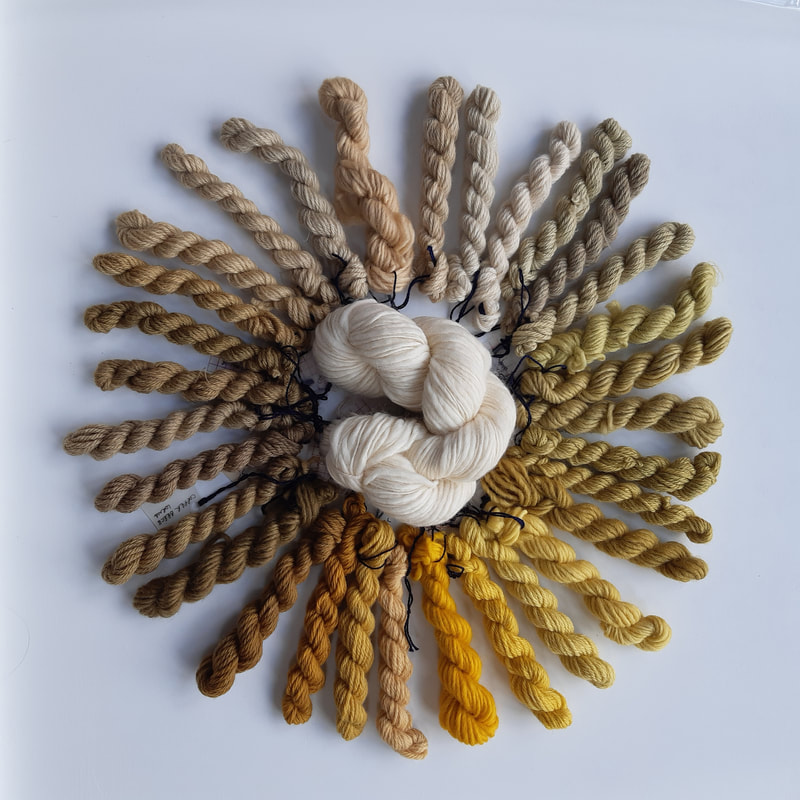
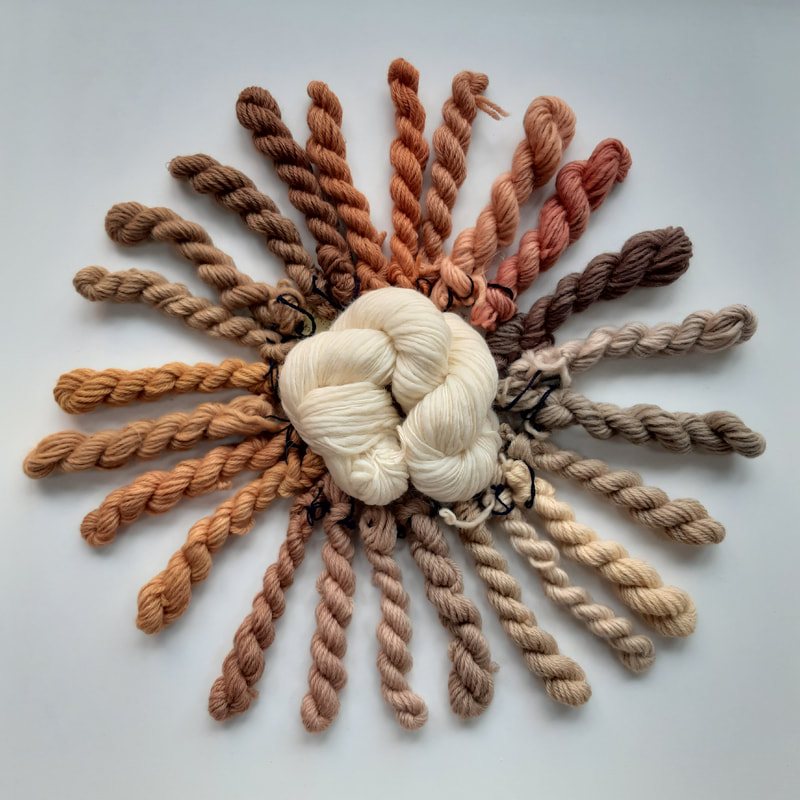
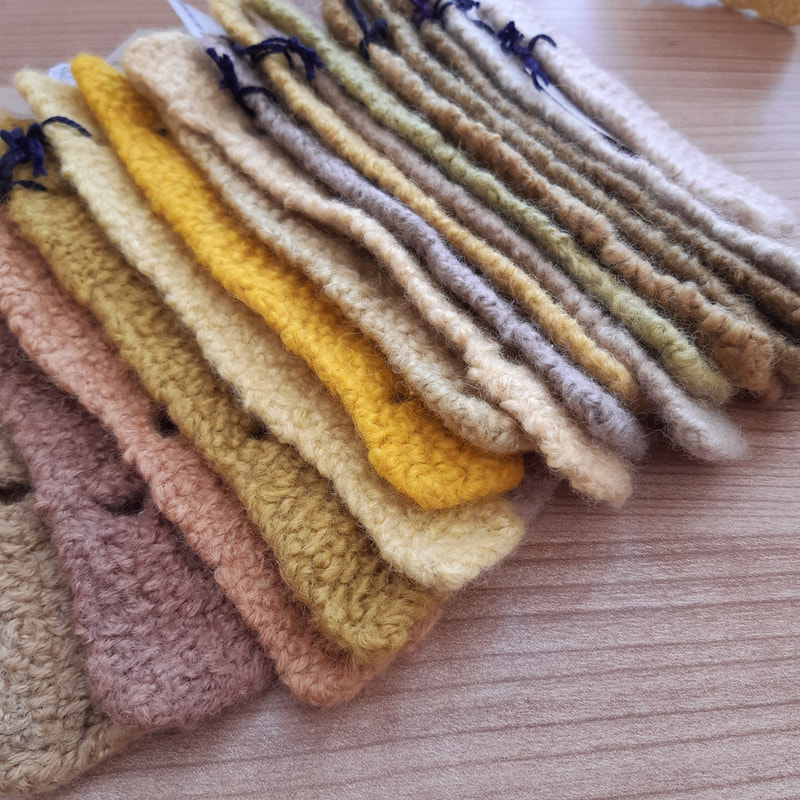
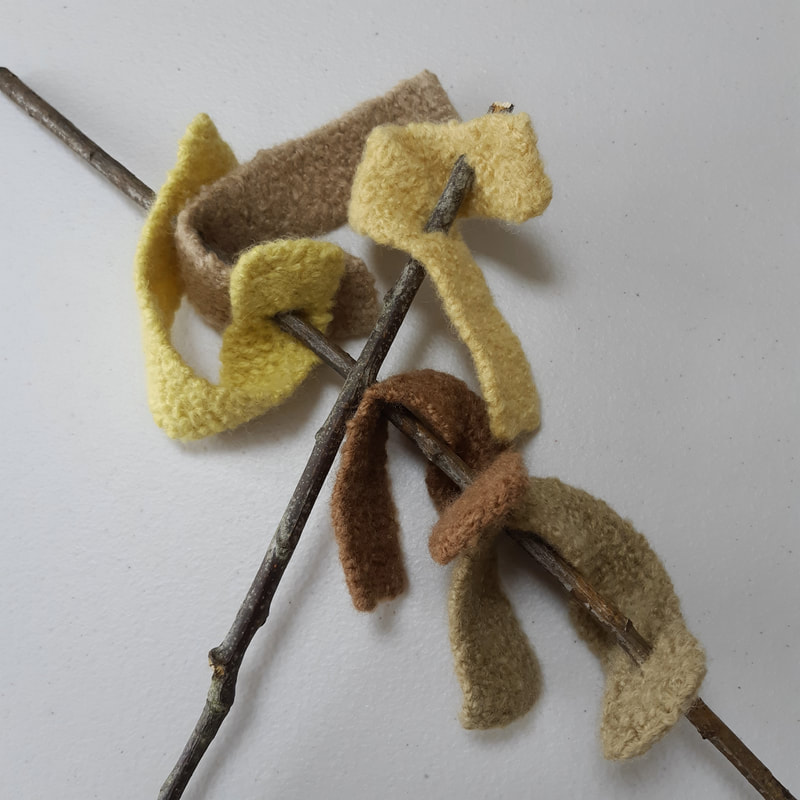
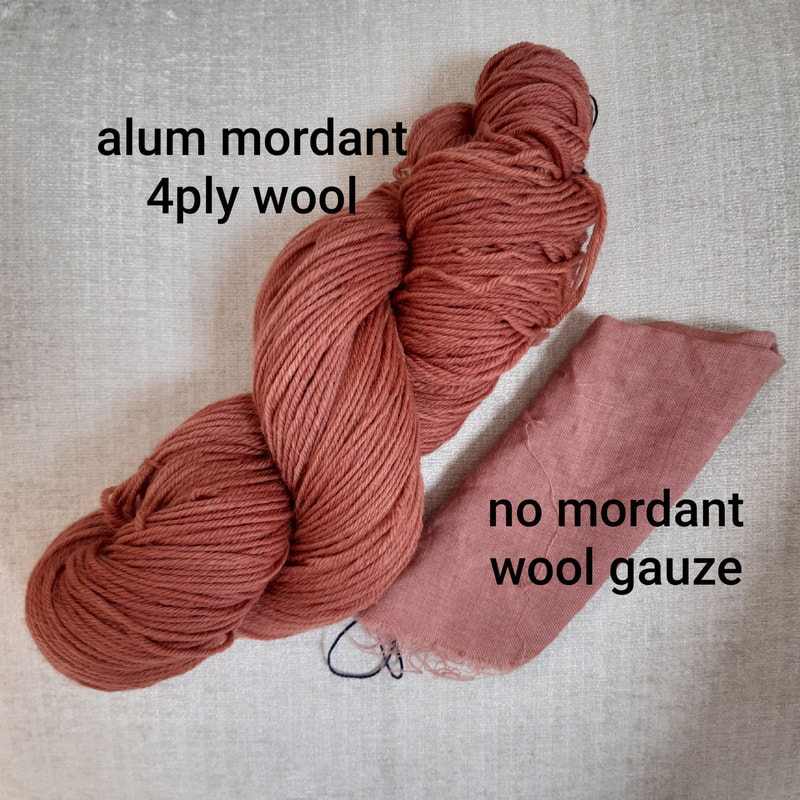
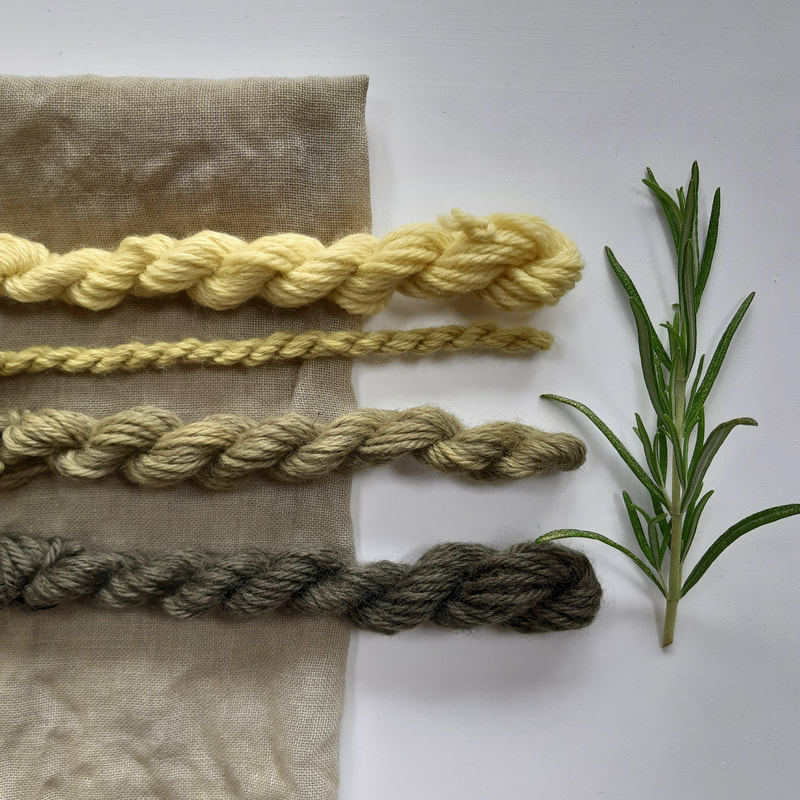
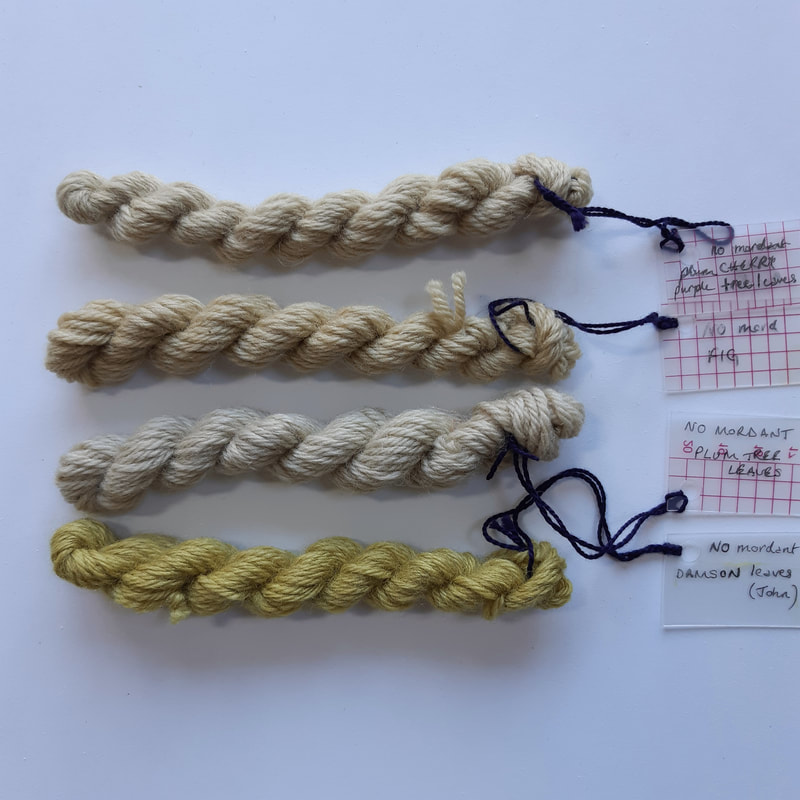
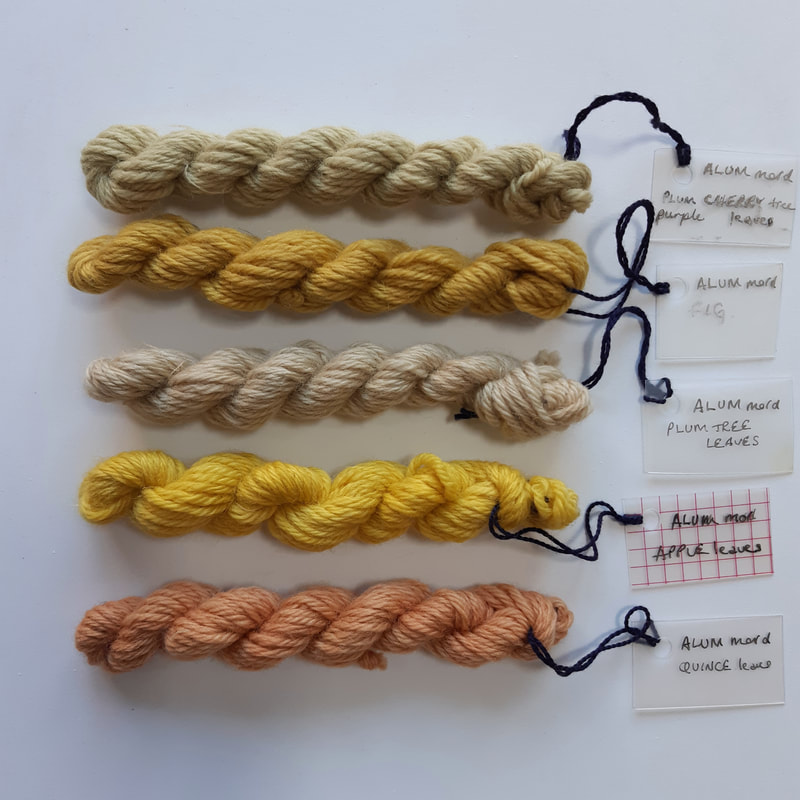
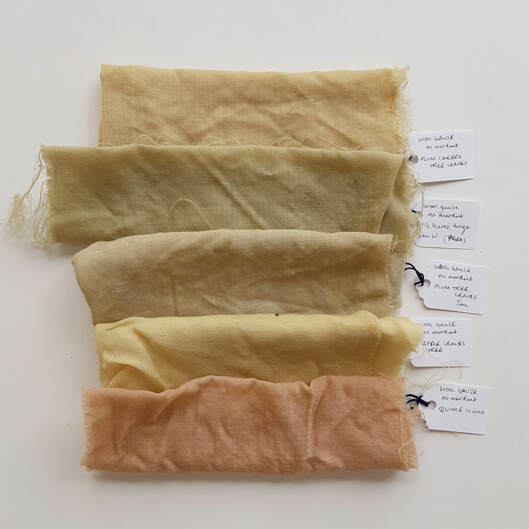
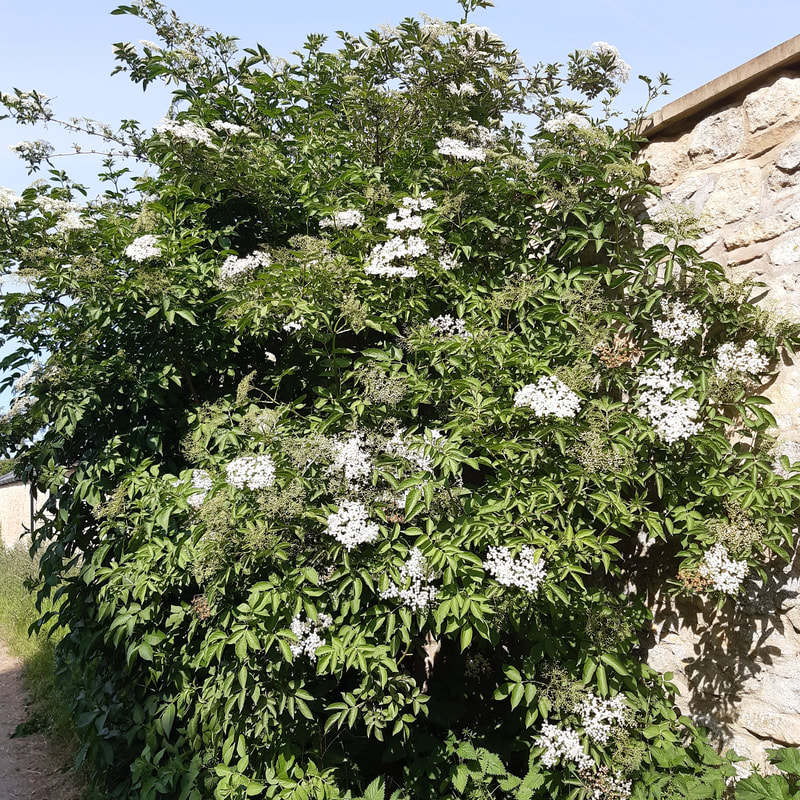
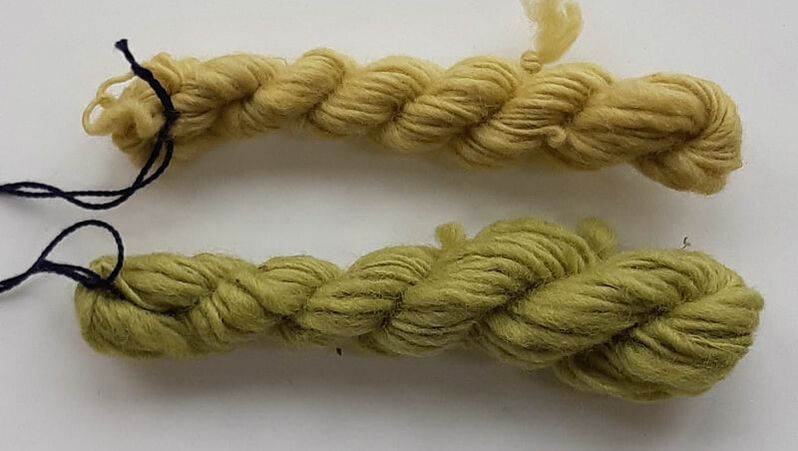
​When we last ‘spoke’ I had been knitting / felting wool ribbons from naturally dyed yarn and was working on a 2 or 3 dimensional piece using them with collected branches.  This had to take a back seat after I damaged my knee and have been immobile for 3 weeks – a case of wannabe runner forgetting her age and recent inactivity and unfitness!
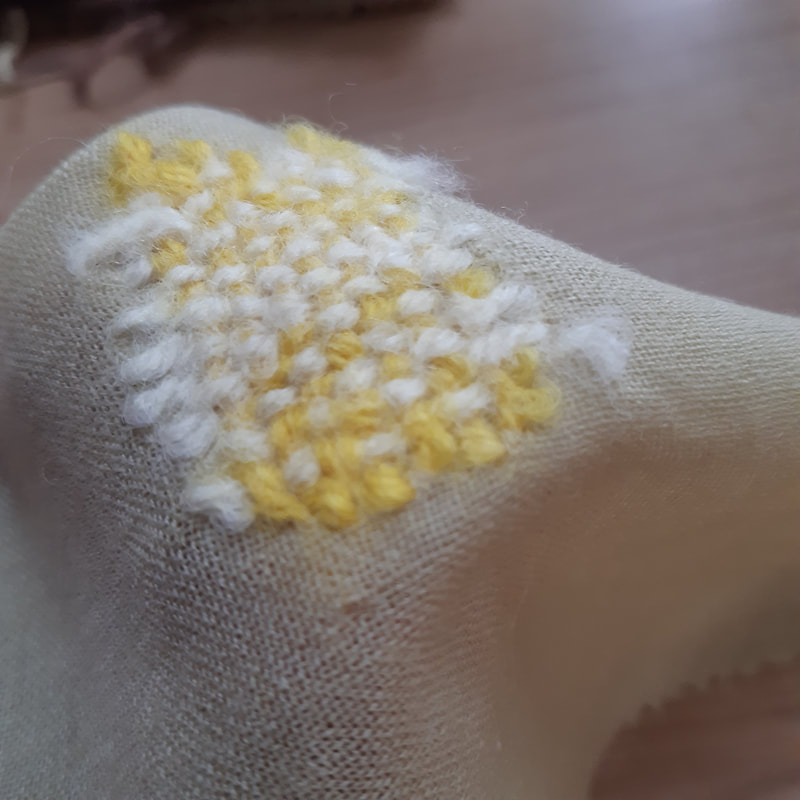
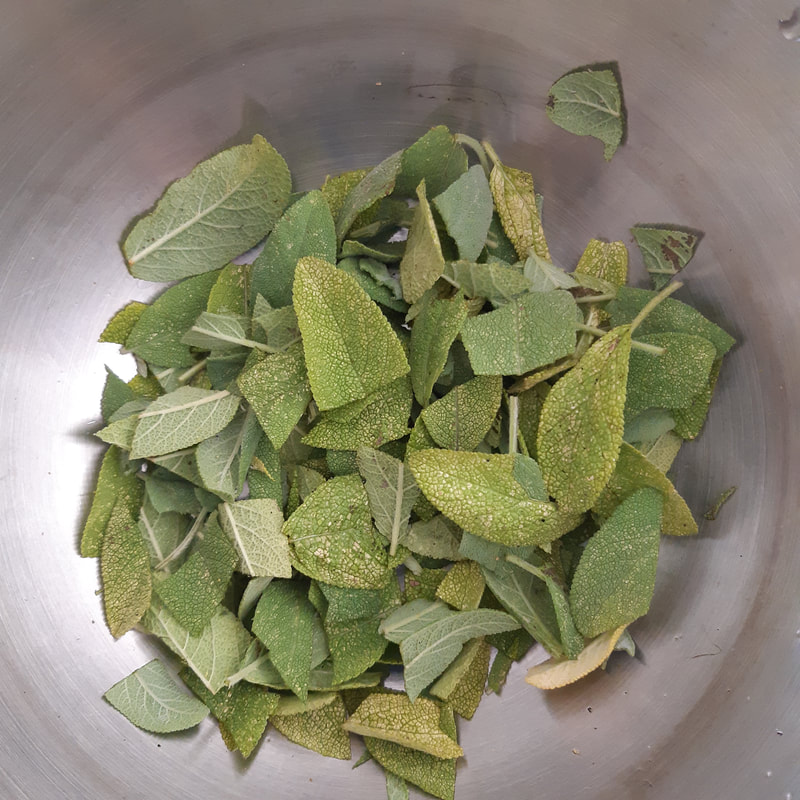
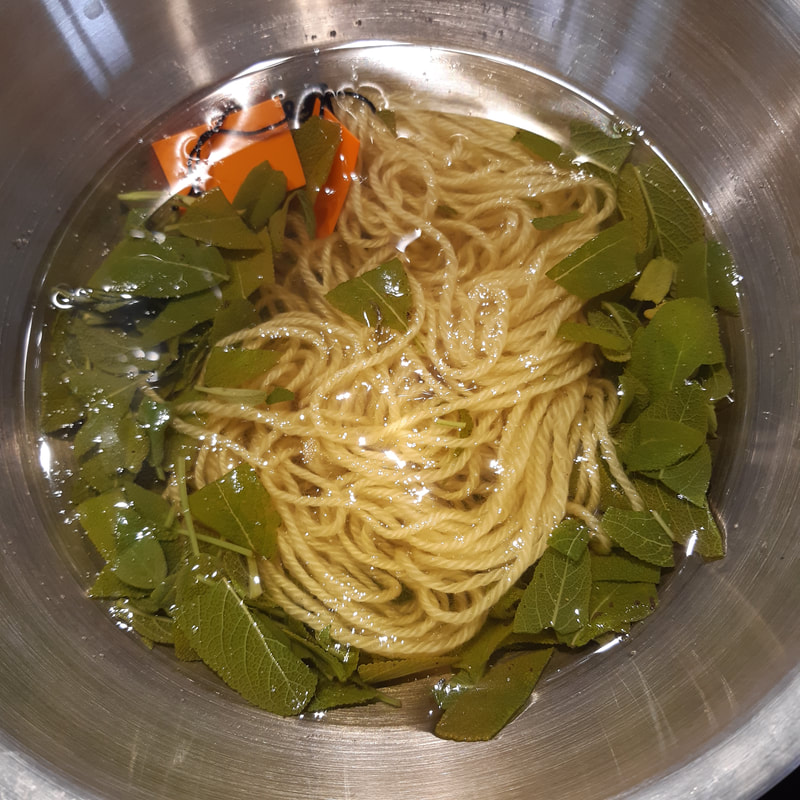
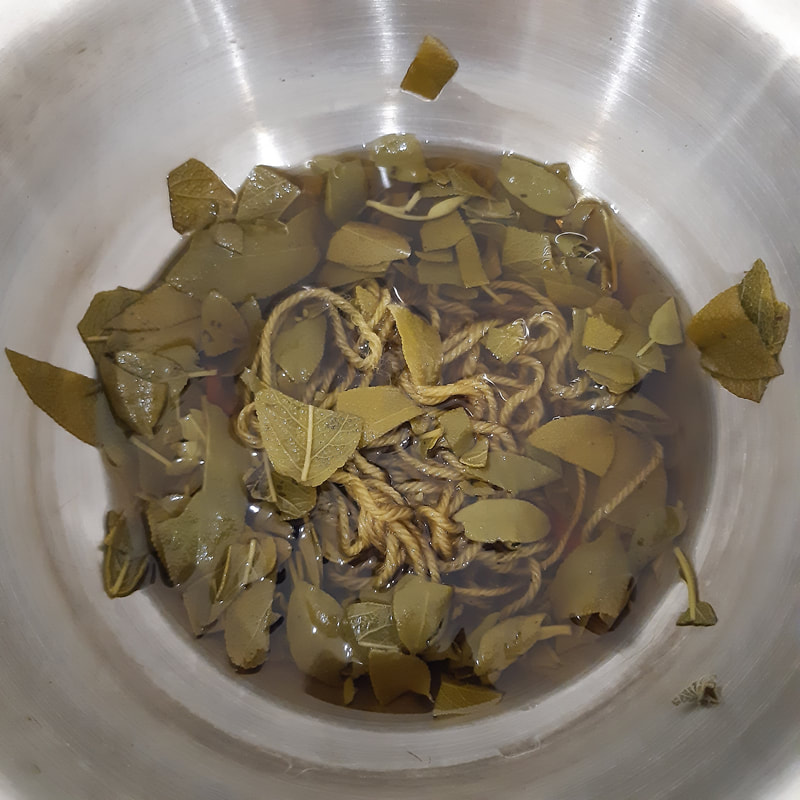
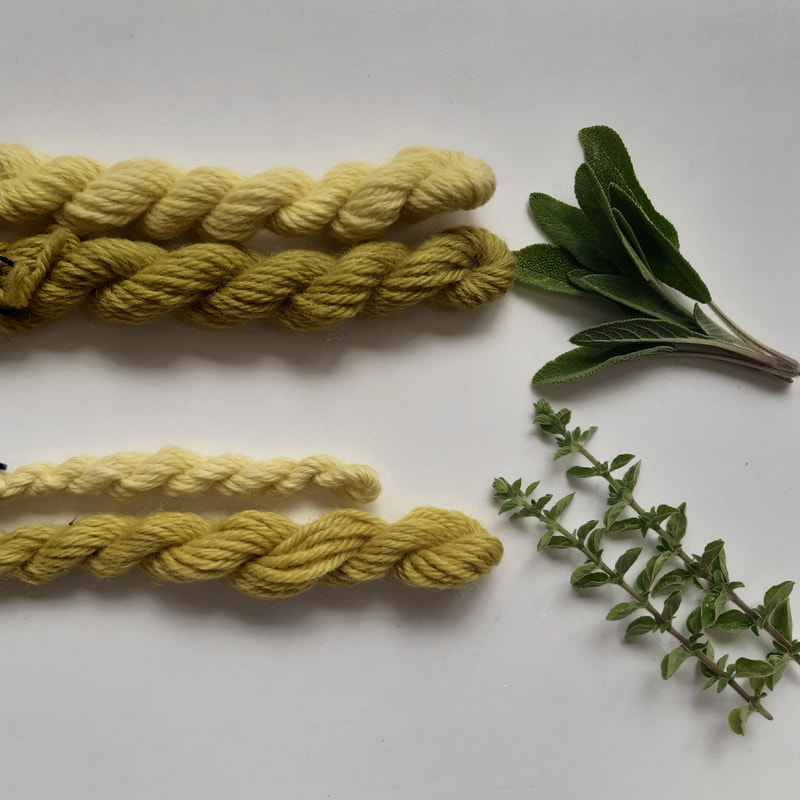
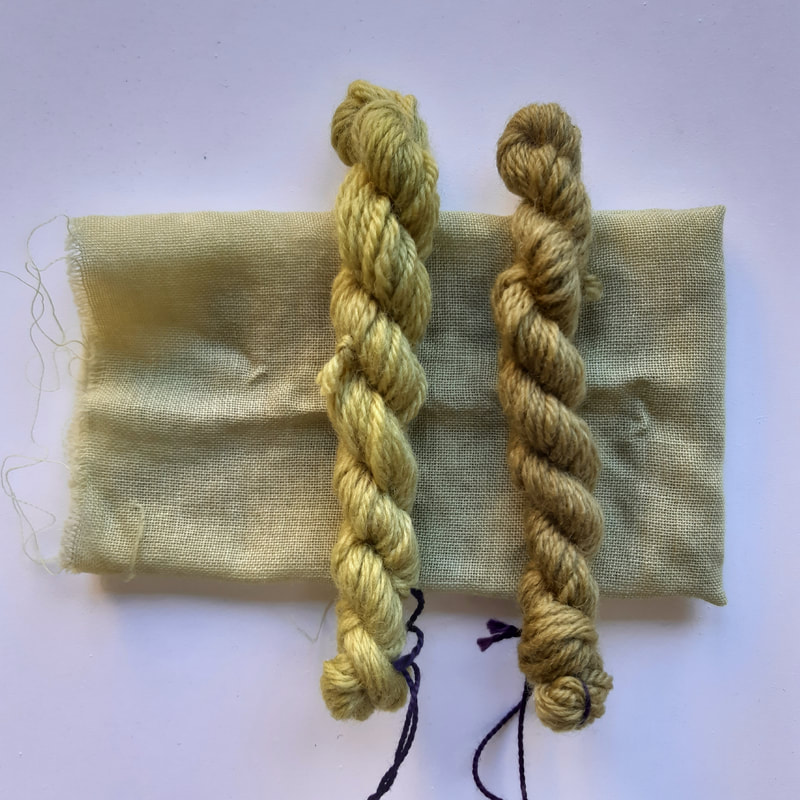
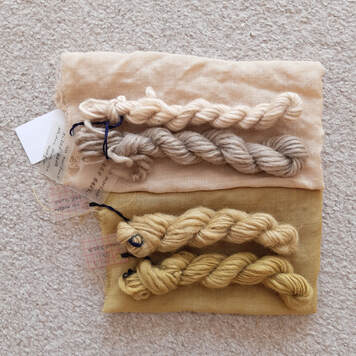
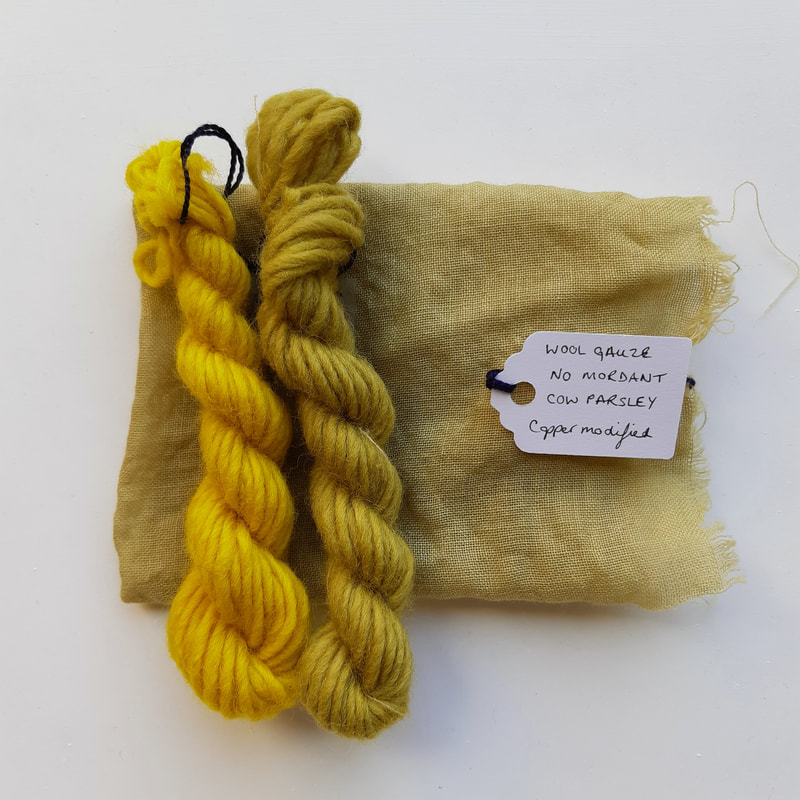
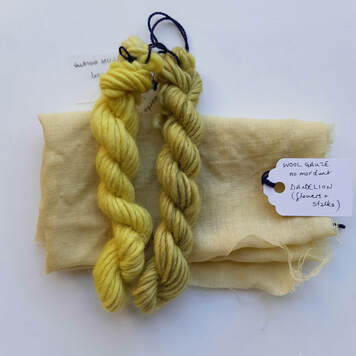
Instead I worked on the naturally dyed wool gauze samples and yarn remnants, hand stitching and darning them while I recovered – a strangely appropriate process of slowing down and mending cloth.
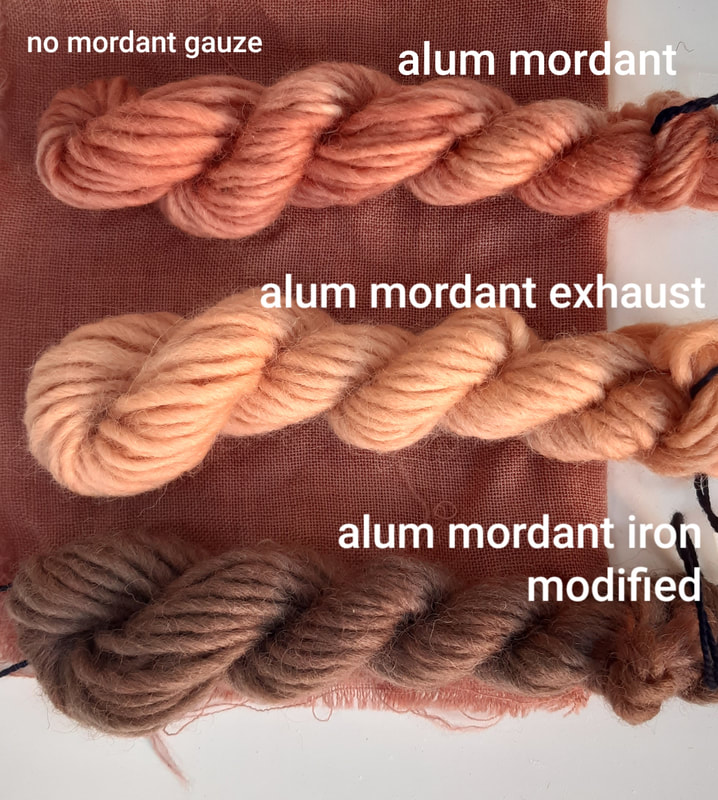
While in Japan a few years ago I was fascinated by the Aomori Textile Museum in Tokyo which houses an amazing collection of boro (“rags”) textiles (1) from the Aomori region in North Honshu.  This region was too cold for cotton; only hemp could be grown and the people were incredibly poor.  They used every scrap of hemp they could produce, reusing, mending and layering garments for longevity and warmth. 
 
These Boro exhibits influenced my resultant wall hanging – piecing together and darning layers of gauze produced “of the land” that is local to me.  A week exposed to the elements in my garden has resulted in a further worn and felted look.
Picture
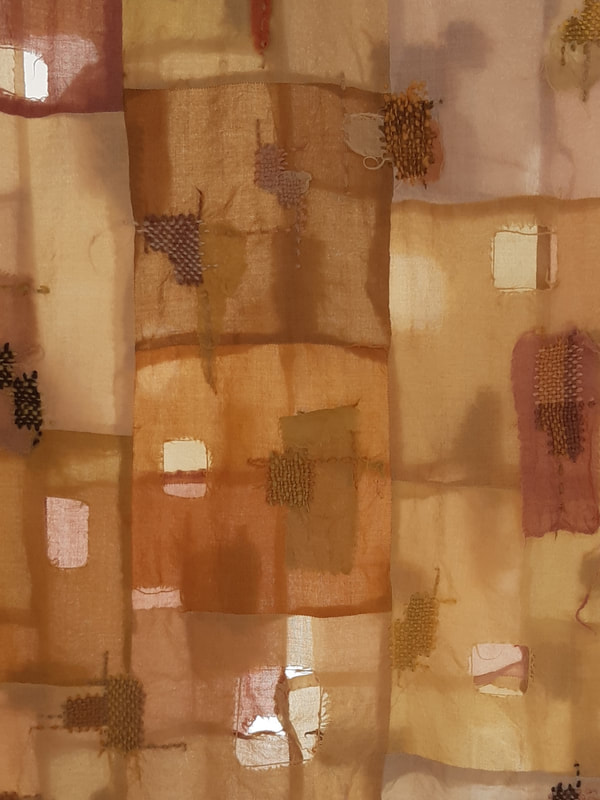
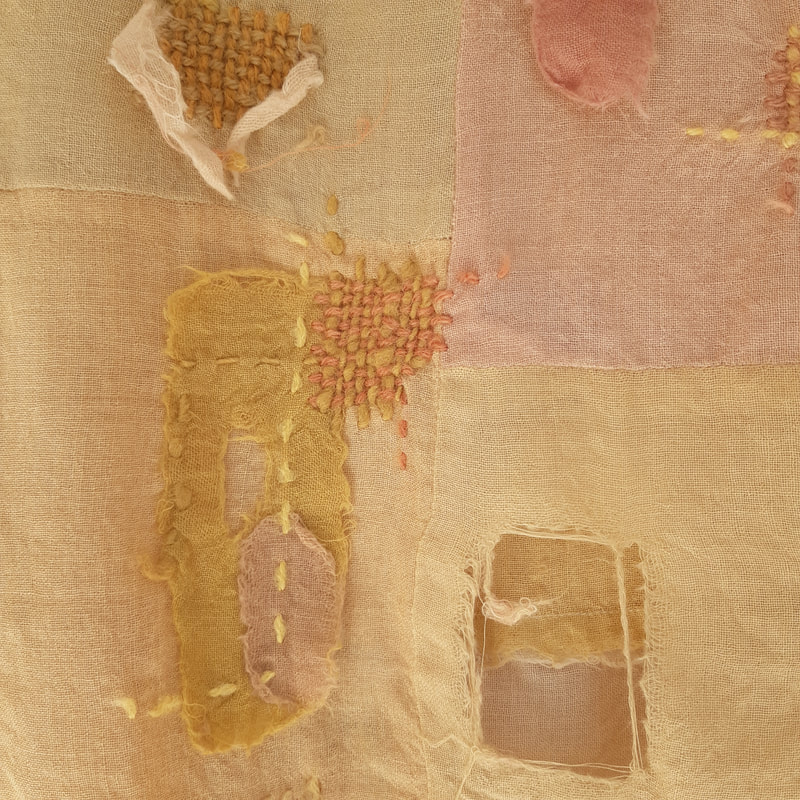
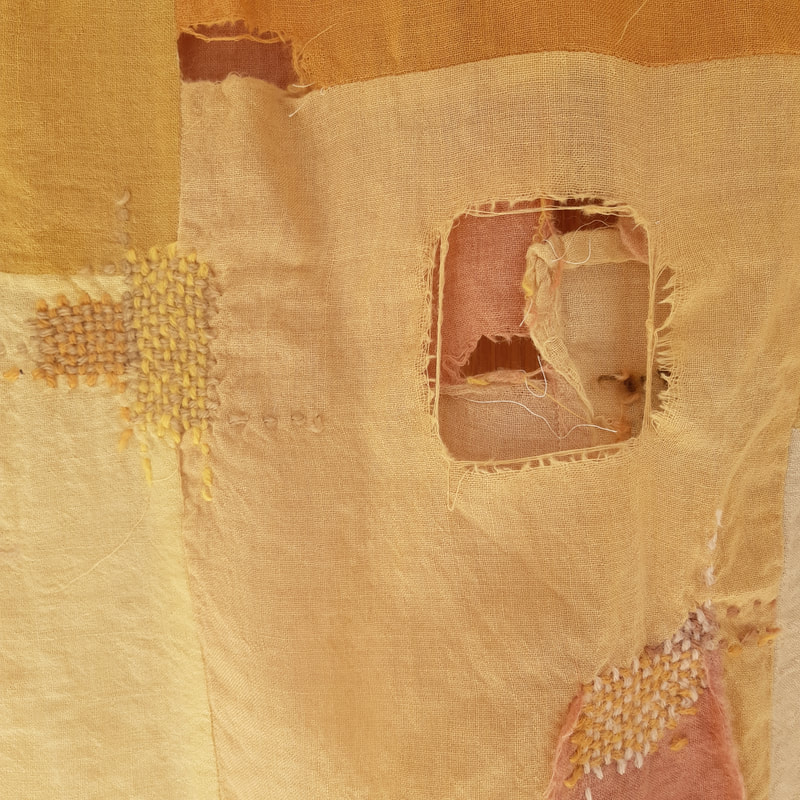
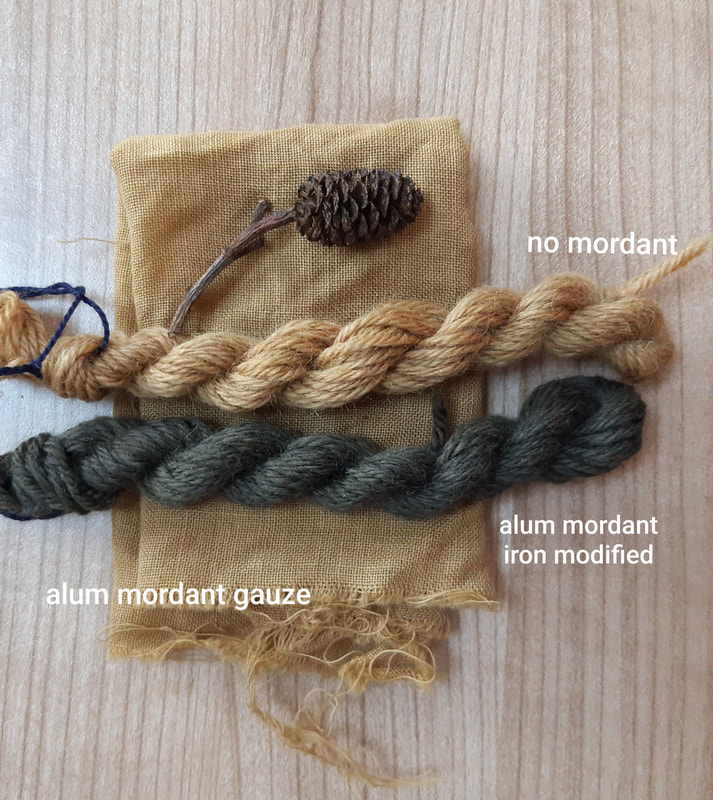
Comprised of 2 pieced layers, it is still transparent enough to allow light through and display the seams.  The following 2 photos are detail shots of the ragged holes and darning.  The wet felting that I did myself and that happened naturally outside by the elements has softened and integrated the stitching into the weave further aging the fabric.
The fabric can be hung from the ceiling in space so that both sides are visible.
Picture
Picture
Picture
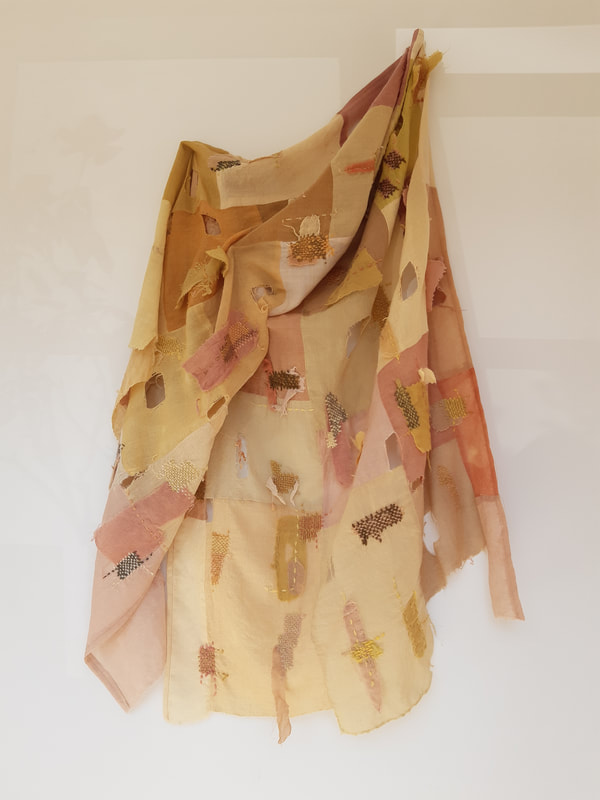
This arrangement of the material gives a closer link to the boro garments of old.

References:
(1) Yukiko Kiode and Kuoichi Tsuzuki (2008) Boro: Rags and tatters from the far north of Japan, ASPECT Corp, Tokyo, Japan
2 Comments

On my doorstep

6/12/2020

0 Comments

 
A few days into UK lockdown, I decided I needed to document this time in a way that was personal and relevant to my life and art practice.  I started a diary of my daily permitted walks around my village and immediate countryside, in search of vegetation with which to naturally dye wool yarn and fabric.  I began to examine these surroundings with new eyes and a greater appreciation of just where I live.  I resolved to work with supplies I already had (feltable undyed DK yarn and wool gauze) or could prepare (alum mordants, copper water and iron water modifiers).
​
​So far I have sampled on my travels 33 different species of plant from tree leaves, flowers and fallen bark generating 69 different coloured samples - approximately the same number of days in lockdown that I have experienced.  You can read the dyeing processes in more detail in previous posts in May on this blog.
Picture
Picture
​The methodical documenting in my sketchbook has brought back memories of lab book work of a former life allowing for personal reflection as well as a much needed focus in this strange time.  I could have dyed wool roving to felt but I wanted to continue the slow approach so I knitted each yarn before felting. I have often found that as I knit I focus on the sounds around me such that these memories are more intense and, when I return to the work, they return.  I can still look at the elderberry leaf sample and remember the tv programme I was watching!   I chose to create ribbons of felted yarn – symbols of awareness and support.  On many occasions ribbons have been tied to trees and posts as powerful signs of devotion, remembering others.  This seemed fitting given the covid-19 situation.  I am still at the designing stage with these ribbons but ideas of their attachment to branches in a wall or sculptural form are forming.  This arrangement will be haphazard, reflecting the non-conformity of nature to our lockdown constraints.
Picture
Picture
Picture
​I have also begun to darn on the samples of wool gauze with the dyed yarn – an attempt to repair the situation or my personal mark of change left?  I am unsure but certainly like many of us my life will never quite be the same again.
0 Comments

Dyeing from the kitchen

6/8/2020

0 Comments


Avocado

One of the easiest and most reliable sources of a good pink (in my opinion) is the avocado - fibre does not need to be mordanted and you get good bang for your buck!  In this particular case I extracted dye from 6 avocados (skins and stones) I had in the freezer and dyed about 150g yarn.  Both of the photos below show the same dyed wool gauze sample for colour comparison.  The alum adds a more salmon tinge to the oink.
Picture
Picture
dyeing with avocados

Rosemary

Having read many instances of dyeing with rosemary and achieving shades of yellow, brown, grey, and even purple? I decided to try this for myself.  We have only a couple of small rosemary bushes in our veg trug so I snipped about 20g of rosemary sprigs, stripping off the rosemary from their stalks into a metal bowl.  I covered them with recently boiled water, added 3 small skeins of yarn (alum mordanted) and wool gauze sample, and left alone overnight.  (Strength would be 200%wof)
Picture
The yarn had turned a pale but bright yellow.  I began to heat the bowl gently over a pot of water and within 5 mins of simmering, the yarn had begun to turn green which increased in intensity after 30 mins simmering then leaving to cool down overnight.  An amazing amount of dye seemed come from so little rosemary.
Picture
Rosemary after 5mins simmering
Picture
Rosemary after 30mins simmering, cooled overnight
I was particularly excited by the green yarn after 30 mins simmering - not many plants seem to give this colour without further modification.  Of course I'm not sure how light fast this will prove, but certainly with repeating, only next time I would put the rosemary in a net bag - the time I spent unpicking them from the yarn......
Picture
Dyeing wool yarn and gauze with rosemary
From top to bottom the yarns are - rosemary at room temperature, 5mins simmering, 30 mins simmering, and 30mins simmering iron water modified.  The wool gauze was not mordanted and was taken out after 30 mins simmering.
​

Sage

After the success of dyeing with rosemary I moved on to sage​ and used the same method as above using also about 200% wof chopped sage leaves.
Picture
Chopped sage leaves
Picture
Dyeing with sage leaves overnight at room temperature
Picture
Dyeing with sage after simmering for 30mins

Marjoram

Next came marjoram or oregano, also around 200% wof of stripped leaves used and treated in the same way as above.
Picture
Oregana Marjoranum leaves
Picture
Marjoram simmered for 30 mins
Picture
Marjoram simmered for 30mins then cooled down overnight
The photo below shows the alum mordanted yarns dyed with sage and marjoram.  both gave a pale yellow (top skein of each pair) when left overnight at room temperature, that progressed to a lime green (bottom skein of each pair) when the pot was simmered for 30 - 45mins and then cooled down overnight.  both produced a lovely green but more slowly for marjoram, and with a much more yellow tinge than rosemary green.
Picture
dyeing wool yarn with sage and marjoram
0 Comments

Dyeing around the garden

6/6/2020

0 Comments


Tulips

Once the tulips in our garden were finished and petals lying on the grass thanks to a fall of hail at the beginning of May, I decided to see what dye could be extracted from them.  The petals were steeped in recently boiled water in a bucket overnight, then simmered gently for 30 minutes with fibres.  I wanted to avoid a pale brown by heating too much, and I was pleasantly surprised by the vibrant chatreuse green in the alum mordanted yarn and non mordanted gauze next morning.  Heating one of the skeins gently in diluted iron water for a further 15 mins gave a dark olive.
Picture
tulip petals - alum mordant yarn (top), alum mordant and iron modified yarn (bottom), non mordanted wool gauze

Rhubarb

We planted some rhubarb in our vegetable trug last year but one of the plants was not looking so clever, so when the offer from my husband came to "use the root if I wanted" I jumped at it.
I cleaned and chopped up the precious root, simmering it for 1 hour then straining out and simmering 2 small skeins of wool and gauze in the dye for a further hour.  The one root only permitted me 100% wof strength but a pleasant pinkish brown was achieved, which changed to a duller brown dipped in room temperature iron water.  Heating up the iron water would probably have changed the colour more dramatically but would have been more harmful to the wool fibres..
Picture
Picture
rhubarb root - alum mordant yarn, right skein iron modified slightly
I cut 3 stalks of the rhubarb and, after a rhubarb crumble was made (great recipe from Nigella using amaretto biscuits in the crumble, that's the secret definitely), I prepared the leaves for further mordant purposes.  Having read all the googled research on the dangers of handling rhubarb leaves containing oxalic acid, I took no chances.  I donned a charcoal filter mask, rubber gloves and simmered the chopped leaves on a camping stove outside.  To maintain a 200% wof concentration I only managed to treat a few skeins of the wool, predictably turning a pale mucky khaki colour.
One of these skeins I tried in the next dye made from dock leaves....
​

Dock leaves

I should stress that the dock leaves were not actually in our garden of course but I picked a few from through the back fence.
The leaves were treated as for the tulip leaves and the resulting colours shown below
Picture
Dyeing with dock leaves
It was interesting to note that the un mordanted yarn (not shown in above photo as it was the one iron modified) was very similar to the rhubarb mordanted one even though the starting yarn was quite a different colour.  Not sure if this meant less dye was taken up by rhubarb mordant relative to alum mordant or just didn't give that brighter yellower look associated with alum.
​

Buttercups

Perhaps as predicted by the yellow marks one often gets on handling the flowers, the resulting dyed fibre was a lovely pale yellow - certainly not as strong a cow parsley but distinct nonetheless for 150% wof.  Simmering in iron water gave a darker khaki green.
Picture
Dyeing with buttercups
0 Comments

Hawthorn

6/5/2020

0 Comments

 
Much of the remaining hedgerows around my village are hawthorn and during lockdown time in May, were full of blossom both white and pink. and so being careful to sample only little from a wide area of hedgerow, I took enough to test out the dye from blossom separately from leaves and twigs.
​The blossom was cut off from the twigs and simmered for an hour, fibres added then allowed to cool down overnight.
The leaves and twigs were cut up into 5cm pieces and left initially in a bucket overnight covered with freshly boiled water.  In the morning this was heated to a simmer for an hour, strained of plant vegetation, fibres added to the dye and allowed to cool overnight (300%wof)
Picture
I was surprised how dark the yellow appeared from the blossom, but then I did use about 500% wof.  The dusky pink of the unmordanted fibre and salmon from alum mordanted fibre were lovely and something I would try to repeat. There should be enough tannin in the leaves and twigs released that I don't necessarily need the fibres mordanted The dusky pink only seems to be produced from un mordanted fibre, and only when it was not heated up too much or for too long.
Picture
from top to bottom : wool gauze with blossom alum mordant, wool gauze with leaves and twigs no mordant, and wool gauze with all parts of hawthorn no mordant
0 Comments

Fruit trees

5/26/2020

1 Comment

 
Testament to the community spirit of my village, when I asked for permission to access neighbours' gardens in this current lockdown to sample their fruit trees, I was inundated with generous offerings and a little curiosity I suspect.  I explained my project and natural dyeing exploration, and was welcomed in to inspect their trees, while observing social distancing of course!

I was able to sample the leaves from the following trees - apple, cherry, plum, damson, fig and quince
The colours of unmordanted fibre (left photo above: top to bottom: cherry, fig, plum, damson) ) were fairly beige to pale olive probably as expected, although the damson leaves did give me quite a vibrant lime green.  The alum mordanted fibres (right photo top to bottom: cherry, fig, plum, apple, quince) were brighter and more yellow in general.  The surprise was the yarn out of the pot containing quince leaves only - such a lovely coral colour.  The unmordanted wool gauze samples showed a similar story,
Picture
Dyed wool gauze (unmordanted) in dye baths of fruit tree leaves (from top to bottom) cherry, fig, plum, apple,and quince
I was lucky enought to ask a neighbour at the time he was having his damson trees pruned and so I came away with sizeable branches from which to remove the leaves and extract the dye.
Picture
Damson
Picture
cut damson branches
Picture
soaking in water overnight
The damson branches and twigs were cut into a bucket, recently boiled water added to cover and left overnight. Appreciable dye could be seen in the bucket at this point   The next morning this was transferred to an urn, heated to a simmer for 1 hour, then twigs removed.  The fibres were added to the liquid and simmered for a further hour then left to cool overnight.  All the fibres had taken up the dye thanks to the tannin from the twigs, but the alum mordanted fibres were brighter and more coral than pink.
PictureTop 3 yarns and gauze are from plum twigs, middle yarn and gauze are unmordanted in damson twig dye, and bottom are alum mordanted in damson twig dye.

Picture
There were many unripened damsons on the pruned branches and so I treated them separately, squashing each fruit and simmering for 1 hour, adding fibre and simmering for a further hour.  Result - no detectable colour change in the fibre.despite there being 300% wof present relative to the dyeing fibre.
1 Comment

Trees (part 2)

5/23/2020

0 Comments


Elder (elderflower)

At this time of year the elder tree just outside our back wall was just coming into flower but I chose to collect the leaves for dyeing. Maybe later in the season I'll tackle the berries!
The gauze was not mordanted but the yarns were mordanted with alum, the one on the right modified after with copper water.
About 200%wof was used and I was suprised just how lovely and bright the green was.  I'd begun to expect rather lichen shades.

Alder

I had to stray over a couple of fields of footpaths to come across an accessible alder, identified from its little cones.
I collected some leaves and also some bark from fallen branches lying underneath.  The leaves were put in a bucket and steeped initially overnight in freshly boiled water then brought to a simmer for 1 hour the next morning. the leaves were strained out and alum mordanted fibres added, simmered for 1 hour and left overnight to cool.
The bark was treated the same except It steeped in a bucket for 3 days before heating. Since there would be tannin from the bark I did not mordant the fibres here.
Picture
From top down, the photo shows alder bark unmodified and modified with copper, then alder leaves unmordanted and alum mordanted.
​A couple of days later I went back and found  lots of fallen alder cones.  Put in a bucket I added recently boiled water to cover and left overnight.  After only a few minutes I could see the water had turned a rich brown.  All the contained seeds and oils had been released from the cones and there was quite an aroma by the morning.  I brought this mixture to a simmer for an hour, strained the liquid and added my fibres.  After an hour's simmer I let it cool down.  The fibres both unmordanted and mordanted with alum were a rich golden brown which turned a lovely dark black/brown when modified in heated iron water.
Picture
Dyeing wool with alder cones

Willow

Testing out the dye from willow leaves was a bit of a suprise for me as I got lovely orange tones on the alum mordanted fibres (left yarn and gauze) which turned a rich brown when modified with copper (right yarn)

Copper beech

I was able to sample 2 or three different copper beech trees around our village and I wanted to see if the degree of copper-ness in their leaves affected the dye.  I had heard that the leaves could give pink shades to the dyed fibres.
In each dye pot for a different tree I found that unmordanted yarn and wool gauze turned brown and alum mordanted yarn (bottom skein in each photo) was quite an olive green.  No pinks unfortunately!  The samples in the left photo came from a copper beech with slightly greener leaves but I didn't find this produced any change in the dye.  The fibres were only paler because the dyepot contained 200%wof versus 300%wof for the samples on the right.  A different mordant might have changed the results of course.

​
0 Comments

Trees galore (part 1)

5/17/2020

0 Comments

 
No shortage of trees around me to sample, but I picked those with blossom first of all - 

Horse chestnut

Picture
Gorgeous examples around both with white and pink blossom.   I wondered if this colour difference would be reflected in the dye produced.  I collected about 150g of each type - cut up the florets into a bucket, covered with hot water and left overnight.  I brought back to simmer for 30mins in the morning, strained out the plant veg and simmered fibre (alum mordanted) in each dyepot for 1 hour, left overnight to cool.
Picture
The white blossom gave a muted yellow (top yarn) while the pink blossom (bottom yarn) which i expected to be very similar was distinctively quite a bright green. Both yarns were mordanted with alum. The un mordanted wool gauze were equally different.

Oak

Picture
I hadn't read of getting much dye from oak leaves so I concentrated on the bark.  Searching under this wonderful tree by the public footpath, I found some old fallen branches and stripped bark, as well as some acorn tops from last year.
The bark I broke up as best I could and let it steep in water at room temperature for 10 days along with a hank of yarn.  Bark and yarn then removed, and the dye liquid heated to a simmer for 1 hour.   Yarn and gauze were added to this pot, simmered for a further hour, then cooled.
I steeped the acorn tops (30g) and un mordanted yarn initially in freshly boiled water. After 4 days they smelt horrible so I didn't feel like heating them up further.  The yarn hadn't appeared to change in colour after this time, unlike the sample in steeped bark after 4 of the 10 days
Picture
(from top to bottom) no mordant in cold oak bark dye for 10 days, no mordant heated oak bark dye, copper mordant heated oak bark dye, no mordant cold acorn dye 4 days
Considering I was extracting dye from very little bark the warm brown produced, particularly when the wool was premordanted with copper, would make this worth repeating.
0 Comments

Getting to know home while I dye

5/15/2020

2 Comments

 
Like so many of us around the world, these last few weeks have been strange and challenging as our lives have gone into lockdown due to the Covid-19 pandemic.  Here in the UK this began officially on 23 March, and with our daily allowance of exercise, I began to discover my immediate environment closely for the first time really.
I am very fortunate to live in a beautiful part of the country outside Oxford, in a village boasting only one posting box by way of conveniences, but full of wildlife and vegetation.  There are footpaths galore and so my daily walks have been a revelation to my senses and hugely improved my knowledge of trees and shrubs in the process.  I decided to document 'my lockdown" by foraging each day for a different plant and examine its natural dyeing capability, hence this blog creation.....
As I write this, we are almost 8 weeks into lockdown with plenty of samples generated but these will continue for some weeks to come I suspect.

I am largely a felting textile artist so I am concentrating on dyeing wool, creating samples in the form of feltable yarn and wool gauze fabric and ,as you'll soon gather, I am pretty much a fast learning novice at natural dyeing.  My background in pharmacy does however help with documenting and note taking - details which still appeal to me even so many years after researching at a laboratory bench. 

​What I propose to do with the samples will come in a later post...but for now I'm just enjoying the process
Picture
I also have to say at this point that my go-to fount of all knowledge in this project is Jenny Dean's Wild Colour book, and my initial successes have been entirely due to her wonderful information and ongoing blogs from her website
All dyeing was done in my laundry area, away from the kitchen and food, and using utensils and urns etc that I reserve for this purpose.  I tend to wear gloves only when I'm mordanting or modifying the fabric with alum, copper water or iron water, and work with the extractor fan on or an open window, but please take whatever precautions you feel necessary for yourself should you wish to try this.
I also found out quickly that I needed waterproof labels for the fibres to prevent the obvious questions - did I mordant this one? - don't know what others use but cut tags of template plastic were ideal in and out of the pot!

Cow parsley

Cow parsley has to be the most abundant at this time of year and this was taken right behind our fence on a public footpath.  From such a tiny white flower you get a great shade of yellow.  The flower heads and some of the stalks (about 300%WOF) were brought to a simmer in water for about 45 mins, the dyepot strained of plant material, the fibres (alum mordanted) added and simmered for an hour then allowed to cool overnight.  The yarn on the right and the wool gauze were copper modified later.

Dandelion

Picture
Dandelion heads were easily gathered, treated the same way as the cow parsley, to dye the fibres.
They gave similiar tones of yellows (alum mordanted) and greens (copper modified) depite the plant material being about 400% WOF).

Nettles

The fibres and gauze were alum mordanted but not modified with copper water.  The yellow yarn on the left was dyed simply without further heat, placed in the bucket of nettle tips (300%wof) which had been steeping in water overnight.  I'd read a blog online that produced shades of grey-green from nettles so I wondered if heat was required to extract the dye.  I simmered the plant material for an hour, strained the liquid, added fibres simmering for a further hour.  The olive yarn and gauze on the right of the photo resulted and I never got a grey-green. I suspect alum was not used by the other blogger as soya milk was mentioned in the preparation of her fibres.
2 Comments

    Author

    Hi I'm Helen MacRitchie, a UK based textile artist in felt and embroidered textiles.  This blog details some of my research into exhibition pieces or just fun developments, enjoy...

    Archives

    July 2020
    June 2020
    May 2020

    Categories

    All
    Avocado
    Boro
    Buttercup
    Darning
    Dock Leaves
    Fruit Trees
    Hawthorn
    Herbs
    Lockdown
    Marjoram
    Natural Dyeing
    Rhubarb
    Rosemary
    Sage
    Trees
    Tulips

    RSS Feed

Powered by Create your own unique website with customizable templates.